
How to Melt Chocolate
We can't do without melted chocolate in the kitchen. That's why it's good to know how to melt chocolate correctly and safely, even in home conditions. Chocolate is sensitive to temperature and humidity, and with the wrong approach, you can easily burn it or cause it to seize. Such chocolate must be thrown away, and that would be a shame. So, let's explain how to do it instead.
We will discuss various methods for melting chocolate – water bath, microwave oven, and melting in a conventional oven. We will explain the differences between these procedures, their advantages and disadvantages, and point out the most common mistakes. Thanks to this, you will handle melting like a professional pastry chef! :-)
High-Quality or Regular Cooking Chocolate?
Before we dive into the melting itself, let's stop at the selection of chocolate. This is a very important step. You might be tempted to reach for cheap cooking chocolate from the supermarket. That usually has a lower cocoa content (often just around the legal minimum of 25% - 35%) and a higher sugar content. In comparison, artisanal bean-to-bar chocolate has a high proportion of cocoa beans and cocoa butter, and therefore melts much better and has a more intense flavor. A separate category is substitutes with vegetable fats (coatings), which will not enrich your dessert with flavor, so we'd rather avoid them.
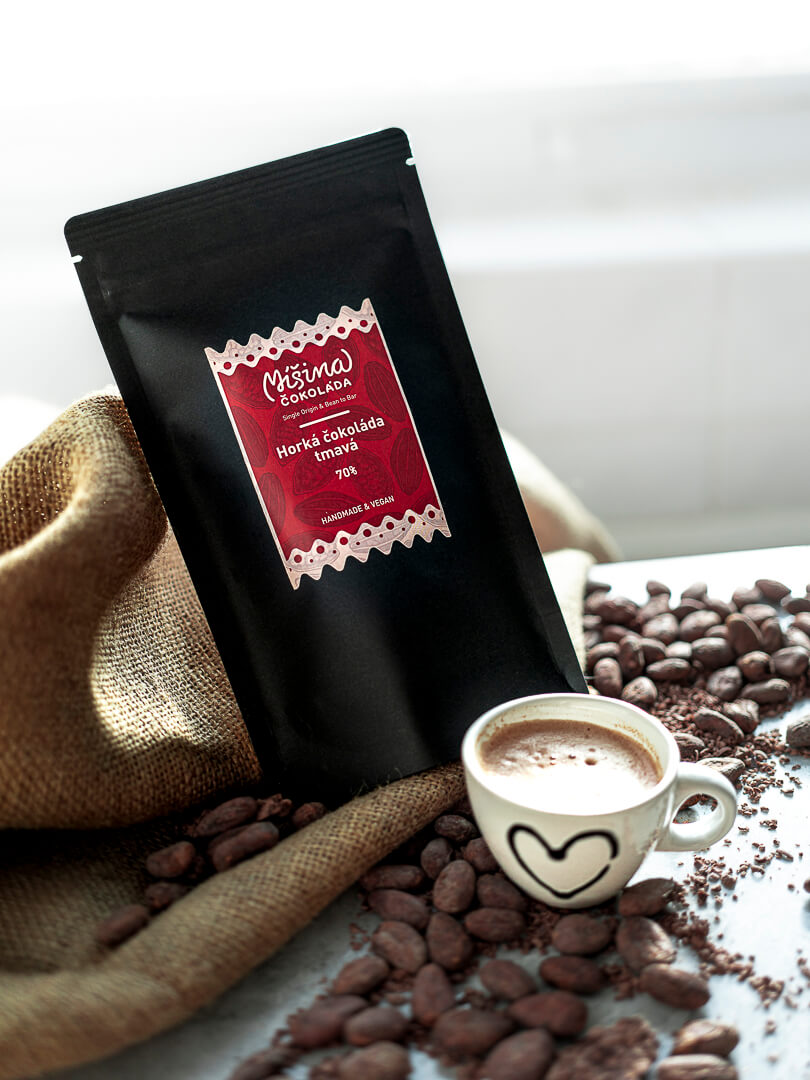
Tip: On our e-shop, you will find a wide range of high-quality products – from high-percentage dark chocolates to milk and white chocolates. For example, Dark Chocolate 70% Bali or Dark Chocolate 85% Tanzania contains only cocoa beans, cane sugar, and cocoa butter, which guarantees a pure taste and easy melting. If you prefer milk chocolate, Milk Chocolate 50% Madagascar is great and tastes beautifully chocolatey. Although white chocolate does not contain cocoa powder, it contains cocoa butter, so it melts easily and evenly.
Quality ingredients are simply the foundation of success; we must not forget that.
How to Melt Chocolate in a Water Bath
The most classic method of melting chocolate is using a water bath. Melting chocolate in a water bath takes place evenly with the help of hot steam. The advantage is that you have the temperature under control and won't burn the chocolate. This method is slightly slower than the microwave, but the chocolate will be smooth, shiny, and without burns. How to do it?
Procedure for melting in a water bath:
-
Prepare the water bath: Pour water into a smaller pot to about a third and heat it to a boil, then reduce the heat so that the water only bubbles slightly (it should not boil vigorously).
-
Container for chocolate: Place a glass or stainless steel bowl on the edge of the pot so that it does not touch the surface of the water. It should hold firmly on the pot.
-
Break the chocolate: Break the chocolate bar into smaller, similarly sized pieces. The smaller the pieces, the faster and more evenly the chocolate will melt. Pour them into the prepared bowl. Or you can use Míša's grated chocolate, which melts very quickly.
-
Slowly melt the chocolate: The bowl with chocolate is heated by steam from the boiling water underneath. Stir constantly so that the pieces melt evenly. Be patient – slow melting guarantees better consistency and flavor.
-
Completion: Once the chocolate is almost melted (only small unmelted pieces remain), take the whole bowl away from the pot. Stir the chocolate away from the heat source until the last pieces of chocolate melt. This prevents unnecessary overheating of the chocolate. Then let the chocolate cool for a few minutes to the desired temperature for further use.
Advantages: Maximum control over temperature and minimal risk of burning the chocolate.
Disadvantages: It takes longer, the chocolate needs to be stirred continuously, and you must watch out for the water and steam. Not even a drop must get into the chocolate; water is the enemy of chocolate. Watch out for rising steam. Even a small drop of water will cause the chocolate to seize (get lumpy) and you won't be able to melt it smooth again. If that happens, you can try adding a bit of hot milk or cream and stir quickly. This creates a ganache, which you can use as a coating. It's a kind of emergency rescue so you don't have to throw the chocolate away.
How to Melt Chocolate in a Microwave Oven
A microwave oven represents a quick and simple way to melt chocolate at home. You don't need a pot with water or a stove; a bowl and a microwave will suffice. Ideal when you're in a hurry or melting only a small amount of chocolate. However, the disadvantage can be uneven heating – microwaves heat the chocolate from the inside and can create hot spots that burn easily. Therefore, the key is caution and continuous stirring.
Procedure for melting in the microwave:
-
Put broken chocolate pieces into a bowl (again – the smaller, the better). Do not cover the bowl with a lid so that any condensation doesn't drip back in.
-
Set the microwave to medium power (approx. 500–600 W if your oven has a 1000 W maximum) – lower power reduces the risk of burning. Heat the chocolate for only 20–30 seconds at first.
-
After the first interval, take the bowl out and stir the chocolate thoroughly. It probably hasn't melted much yet, but stirring distributes the heat.
-
Return the bowl to the microwave and continue heating in short intervals – for example, 15 seconds. Stir again after each interval. The chocolate will start to melt gradually. Some pieces may remain solid while others are already melted – that's why stirring is so important.
-
Once the chocolate is mostly melted (e.g., half liquid, half still pieces), shorten the heating time to 5–10 seconds. Continue until only small bits remain. The chocolate might not look completely melted in the microwave, but after stirring, you will find that it actually is.
-
Stir out the last lumps just by mixing. The heat of the melted part will dissolve them. This minimizes the risk of overheating and burning.
Advantages: Speed and simplicity – you melt the chocolate in a few minutes directly in the bowl, which you can then use immediately for further work. No need to watch a pot of water or dirty more dishes.
Disadvantages: Higher risk of burning if you forget to stir or choose a heating time that is too long. The microwave heats unevenly, so without stirring, part of the chocolate can burn while another part isn't even melted yet. Also, with a very small amount of chocolate (e.g., a few squares), it can be difficult to set a sufficiently short heating time – in that case, better use a water bath or a conventional oven.
Chocolate Tempering: Why It Is Important and How to Do It
We will stay with melting chocolate for a while longer and look at chocolate tempering. What exactly is it and when do we need it? Tempering is the controlled management of the temperature of melted chocolate so that it has the correct structure after solidifying – a beautiful shine, smooth surface, and snappiness when broken. If you just melt chocolate and let it solidify, it easily happens that it will be matte, soft, or develop a whitish coating (so-called sugar or fat bloom). This is a result of poor crystallization of cocoa butter. By tempering, you ensure that a stable crystal lattice of cocoa butter (Form V) is formed in the chocolate, making the final product perfect in appearance and taste.
When to temper: Tempering is necessary mainly if you are preparing chocolate glazes, pralines, candies, or home-made chocolate bars; basically, whenever the melted chocolate forms the final layer or product. If, on the other hand, you are melting chocolate just to stir it into dough, cream, or another mixture, tempering is not necessary – there, the chocolate changes structure again anyway and solidifies along with the other ingredients.
There are several methods of tempering (on a marble slab, seeding, etc.); we will show a simple tempering procedure that you can handle even at home with minimal tools. Ideally, get a kitchen thermometer so you can monitor temperatures with precision.
Procedure for tempering chocolate (seeding method):
-
1. Melt and heat the chocolate: In a water bath or microwave, carefully melt approx. 2/3 of the amount of chocolate you want to process. Heat the chocolate to the initial temperature – for dark chocolate roughly 45–50 °C, for milk around 40–45 °C, and for white 40 °C is enough (never overheat white chocolate, it is very sensitive). Make sure all the chocolate is melted and smooth.
-
2. Cool the chocolate by adding (seeding): Remove the bowl from the water bath (or take it out of the microwave) and add the remaining 1/3 of chopped chocolate. This seeds the chocolate with stable cocoa butter crystals. While constantly stirring, let this added chocolate melt in the hot mass – the mixture will thus begin to cool. Stir until the temperature drops to approximately 27–28 °C for dark chocolate (for milk to about 26–27 °C, for white approx. 25–26 °C). The chocolate should now begin to thicken and have a flatter shade – this is a sign that the desirable crystals are forming. If any unmelted pieces still remain, you can remove them.
-
3. Slightly reheat to working temperature: Now it is necessary to heat the chocolate a bit again so that it is liquid for working, but not above the critical limit. Return the bowl over a water bath with very slightly warm water (or into the microwave for a few seconds on low power) and carefully heat the chocolate to the so-called working temperature. For dark chocolate, this is around 30–32 °C, for milk roughly 29–30 °C, for white about 28–29 °C. At this temperature, the chocolate should be smooth, liquid, and ready for dipping pralines, filling molds, or spreading on parchment paper. Watch out, do not reheat too much again – do not exceed the stated temperatures, otherwise you would cancel the tempering and have to start over.
With this procedure, the chocolate should be correctly tempered. You can test it: dip the tip of a knife or a piece of parchment paper into the chocolate and put it in the fridge for a moment. Correctly tempered chocolate will solidify within a few minutes, have a uniform color, and a firm structure. If it remains soft or matte, the tempering failed (often due to the wrong temperature), and it is recommended to repeat the whole process.
Why bother with tempering? Because it is precisely tempered chocolate that makes the difference between home-made chocolate and a professional-looking product. A well-tempered glaze on a cake will snap after solidifying and won't melt immediately on your fingers. Pralines will be shiny and smooth, without gray maps. If you invest in excellent chocolate (like high-quality 70% dark from Míša's Chocolate), it would be a shame to degrade it during final finishing by not tempering. Tempering may sound complicated, but with practice you will soon master it routinely – and the results are worth it!
Most Common Mistakes When Melting Chocolate and How to Avoid Them
When melting chocolate, mishaps occasionally occur. To conclude, let's summarize the most common mistakes home cooks make and advise on how to prevent them:
-
Too high temperature – overheating chocolate: The greatest enemy of chocolate is excessive heat. When you heat chocolate too much (e.g., with boiling water or for too long in the microwave), it burns – this manifests as fat separation (the chocolate will be greasy, lumpy, and may change color to gray or yellow). You can no longer save such a mass; it has a burnt taste. ➡ Solution: Always heat gently, preferably slower and at a milder temperature. Dark chocolate should not exceed ~50 °C, milk and white even less. In a water bath, keep the water below boiling point, and in the microwave method, heat in short intervals. Always monitor and stir the chocolate.
-
Moisture and water in chocolate: As already mentioned, water causes chocolate seizing – it becomes a stiff, lumpy paste. A typical situation is steam from the water bath condensing into the bowl, or an accidental drop of water from a spoon. ➡ Solution: Always use perfectly dry dishes. With a water bath, maintain a gentle simmer and ensure the bottom of the bowl does not touch the water. Be careful when covering the bowl (better not to cover) and when stirring so that nothing drips inside. When you need to thin chocolate, never add water – instead use a drop of vegetable oil or a piece of cocoa butter or butter. Fat will combine with chocolate; water will not.
-
Insufficient stirring: Chocolate needs to be regularly stirred during melting. If you just leave it on the heat without intervention, the edges can burn before the middle melts. Especially in the microwave, stirring is key, otherwise hot spots will form. ➡ Solution: Stir often and thoroughly, ideally with a whisk or spatula, even during a water bath (remove the bowl from the steam for a moment, stir, return). Stirring ensures an even temperature throughout the mass.
-
Hurry and large pieces of chocolate: Someone might try to melt an entire chocolate bar in one piece – that is almost impossible without burning the outer part before the inside melts. ➡ Solution: Always chop the chocolate into small pieces. This shortens the melting time and eliminates the risk of burning the surface of a large piece. Also, do not hurry by increasing the flame or power – patience brings velvety smooth chocolate.
-
Use of an unsuitable container: A too thin metal bowl can lead to overheating; a plastic container, on the other hand, can release unwanted substances or deform. ➡ Solution: Use heat-resistant bowls (glass, stainless steel). These hold heat evenly and do not affect the taste of the chocolate. Also, choose silicone or wooden utensils over plastic.
-
Tempering skipped or poorly done: If you melt chocolate for a glaze and do not temper it, the resulting surface may be pale and soft. If tempered poorly (wrong temperatures), the effect will not occur. ➡ Solution: Learn to temper chocolate according to the instructions above. While it is not essential for basic glazes on home baked goods, it really pays off for pralines and decorations. If you don't want to temper, choose recipes where fat or cream is added to the chocolate (for example, ganache), which ensures stability even without tempering.
Final Advice and Recommendations
Melting chocolate is a simple pastry technique with a bit of practice that opens the door to a whole range of delicious recipes. Whether you are preparing a chocolate glaze for a cake, dipping Christmas cookies, or venturing into making home-made chocolate or pralines, correctly melted (and possibly tempered) chocolate is the foundation of success. Remember to choose high-quality chocolate – with honest high-percentage chocolate, it will be easier to work with, and the resulting taste will be incomparably richer than when using cheap substitutes. The Míšina čokoláda brand offers a wide selection of bean-to-bar chocolates ideal for cooking and snacking; quality ingredients always reflect on the result in confectionery.
Summary: The simplest and safest way is to melt chocolate in a water bath, which prevents burning. A quick alternative is the microwave oven, where, however, you must heat briefly and stir so you don't burn the chocolate. For a perfect appearance and snap of finished glazes and pralines, learn to temper chocolate – it's not hard and your creations will look professional. Avoid typical mistakes like water in chocolate or overheating. With this knowledge, you will melt any chocolate quickly, correctly, and without problems. We wish you much success and, above all, bon appétit!